
1. Brief Introduction
Arduino is an open-source electronics platform based on easy-to-use hardware and software. Thanks to its simple and accessible user experience, Arduino has been used in thousands of different projects and applications. It runs on Mac, Windows, and Linux. Moreover, it is extremely compatible with many microcontrollers. So with this post, I take NodeMCU board as an example to show you how to install outside boards on Arduino IDE
2. Installing Process
- Download the Arduino IDE
- Open the preferences window from the Arduino IDE. Go to File> Preferences

- Enter URL into the “Additional Board Manager URLs” field as shown in the figure below. Then, click the “OK” button. For ESP32, the json link is https://dl.espressif.com/dl/package_esp32_index.json; for ESP8266, the json link is http://arduino.esp8266.com/stable/package_esp8266com_index.json.

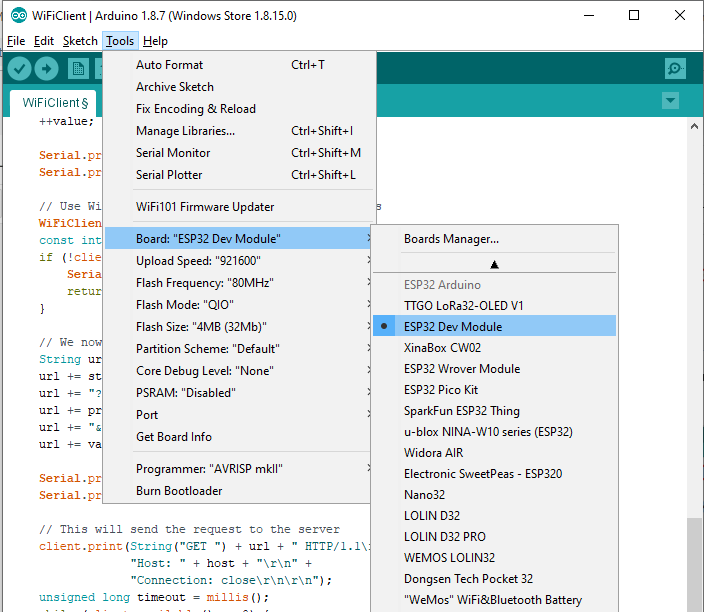
- Open boards manager. Go to Tools > Board > Boards Manager…

- Search for ESP32 or ESP8266 and press install button:

- Select your Board in Tools > Board menu. For ESP32 DEVKITV1, the board should chooseESP32 Dev Module; For ESP8266(CP2102), the board should choose

- The installment is finished. However, before you can start your journey with ESP boards in Arduino IDE. You really need to know their pins layout. For ESP32 ESP32: https://www.instructables.com/id/ESP32-Internal-Details-and-Pinout/. For ESP8266: https://circuits4you.com/2016/12/14/esp8266-pin-diagram/
ESP8266 Pin_layout

ESP32 Pin_layout


No comments:
Post a Comment